
My quilt guild is doing a block of the month sampler quilt. I'll let you know more about that in another post.
But we are learning different methods of doing flying geese, so I thought I'd let you in on it and my mistakes.
Method #1
I wanted 4 flying geese to measure 4 1/2 x 2 1/2" when finished. Our instructions did not say what size to cut the fabric to get the proper size. So in looking at it, I decided to cut my pieces just an eighth inch larger than the finished size. I cut one green at 4 5/8" and 4 yellow at 2 5/8". I laid 2 yellow squares at opposite corners and drew a line down the center. I then sewed a 1/4" seam down both sides.

I cut on the line and pressed it open towards the green. I then added the other yellow squares to the remaining corners, drew the line and sewed on each side. Then I cut and pressed.

I trimmed them up and had 4 squares measuring 2x4" and a little short at that. So I will set them aside for another project and make another set since they are too small. I will have to figure out what size to do. Or buy a ruler for flying geese?

Method #2
This is the Eleanor Burns method and I think I really like it better. I messed this one up also.To come up with 4 - 4 1/2 x 2 1/2" rectangles, you cut 2 squares. The green fabric is the triangles on the side and the white is the center. I cut the green fabric into a 7" square and the white into a 5" square. I drew a line down the center, put a couple of pins to hold it in place and sewed 1/4" down both sides.

I cut it down the line and now I have 2 squares. I pressed towards the green.

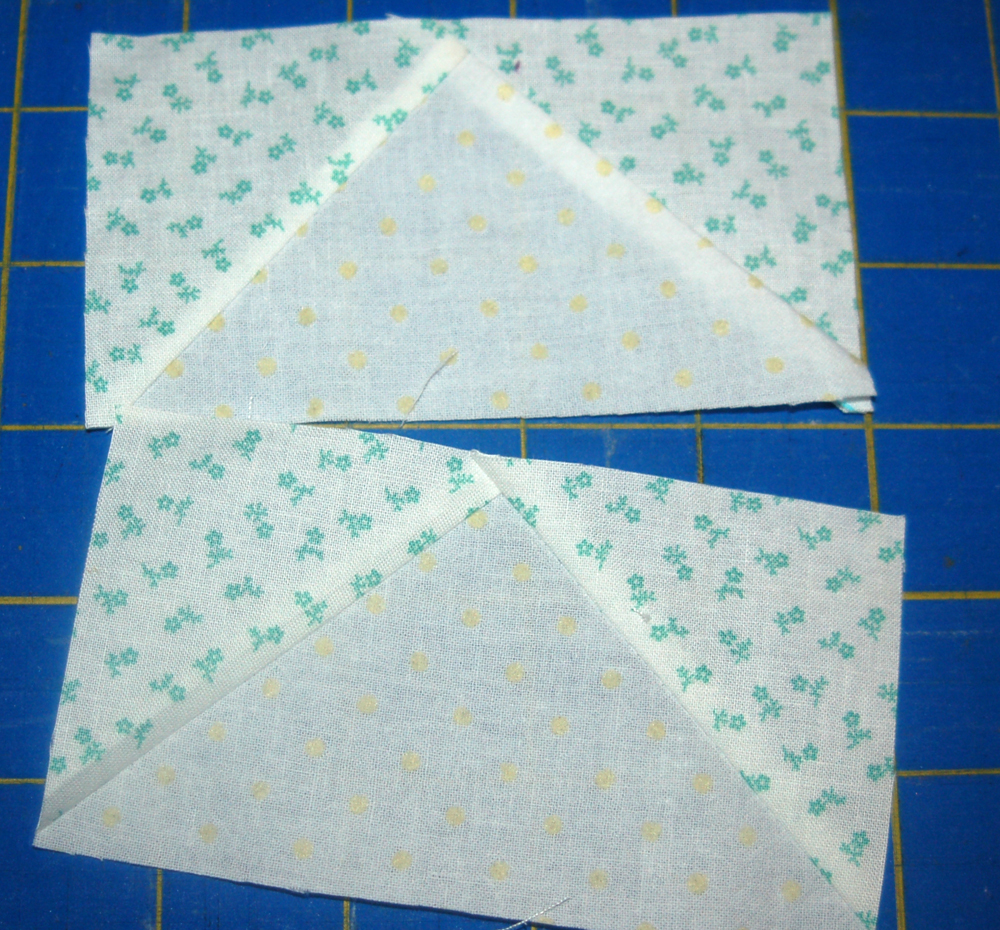
I stacked these up together with the white on top of the green, so they are opposites. They do not line up on the sides. I drew a line down the center and sewed down both of these sides.

Here I've opened one up so you can see it. I have 2 lopsided squares.

This is my mistake. Look where I cut. How can I get flying geese out of this? Well, I'll save this for another time also.

Now here is the proper cut.

Trim them off and if you did them better than I, you should have 4 flying geese.
And Eloise. I'm holding her when these were taken. She loves to smile.

ONE MORE DAY TO ENTER MY GIVE AWAY FOR THE TABLE RUNNER.
Ricky Timms has an interesting flying geese method. You should check that one out too. I found with the two methods you showed - it is all about the cutting and where to trim that determines the success of perfect geese.
ReplyDeleteDarling baby!
Moda Bakeshop on January 31 has a tutorial on a flying geese quilt. But I have not gotten far enough to know how well it works. Sorry. That has to wait a couple more days.
ReplyDeleteComfortable flying geese I must say.First method is interesting.Baby is too cute!!
ReplyDeleteHere's a link to Patti Anderson's flying geese method--the one you were trying first. It's my favorite method when I need four flying geese.
ReplyDeletehttp://www.patchpieces.com/files/flyinggeese.pdf
I find it fast and easy and reliably accurate.